
Pattern editor
The pattern editor is where most of the music gets written. Think of it as a spreadsheet that plays from top to bottom: each row is one step, and each channel is a voice of the chip. Notes, instruments, tables, volumes, and effects all live here.
Which pattern you are looking at comes from the order list. Change the order slot, and the grid updates to that pattern.
In Bitphase a song is per chip, so the columns match that chip (AY, NES, and so on). A project can hold several songs side by side - each one gets its own pattern editor.
See also Keyboard for shortcuts and the piano layout, and Effects for the effect column.
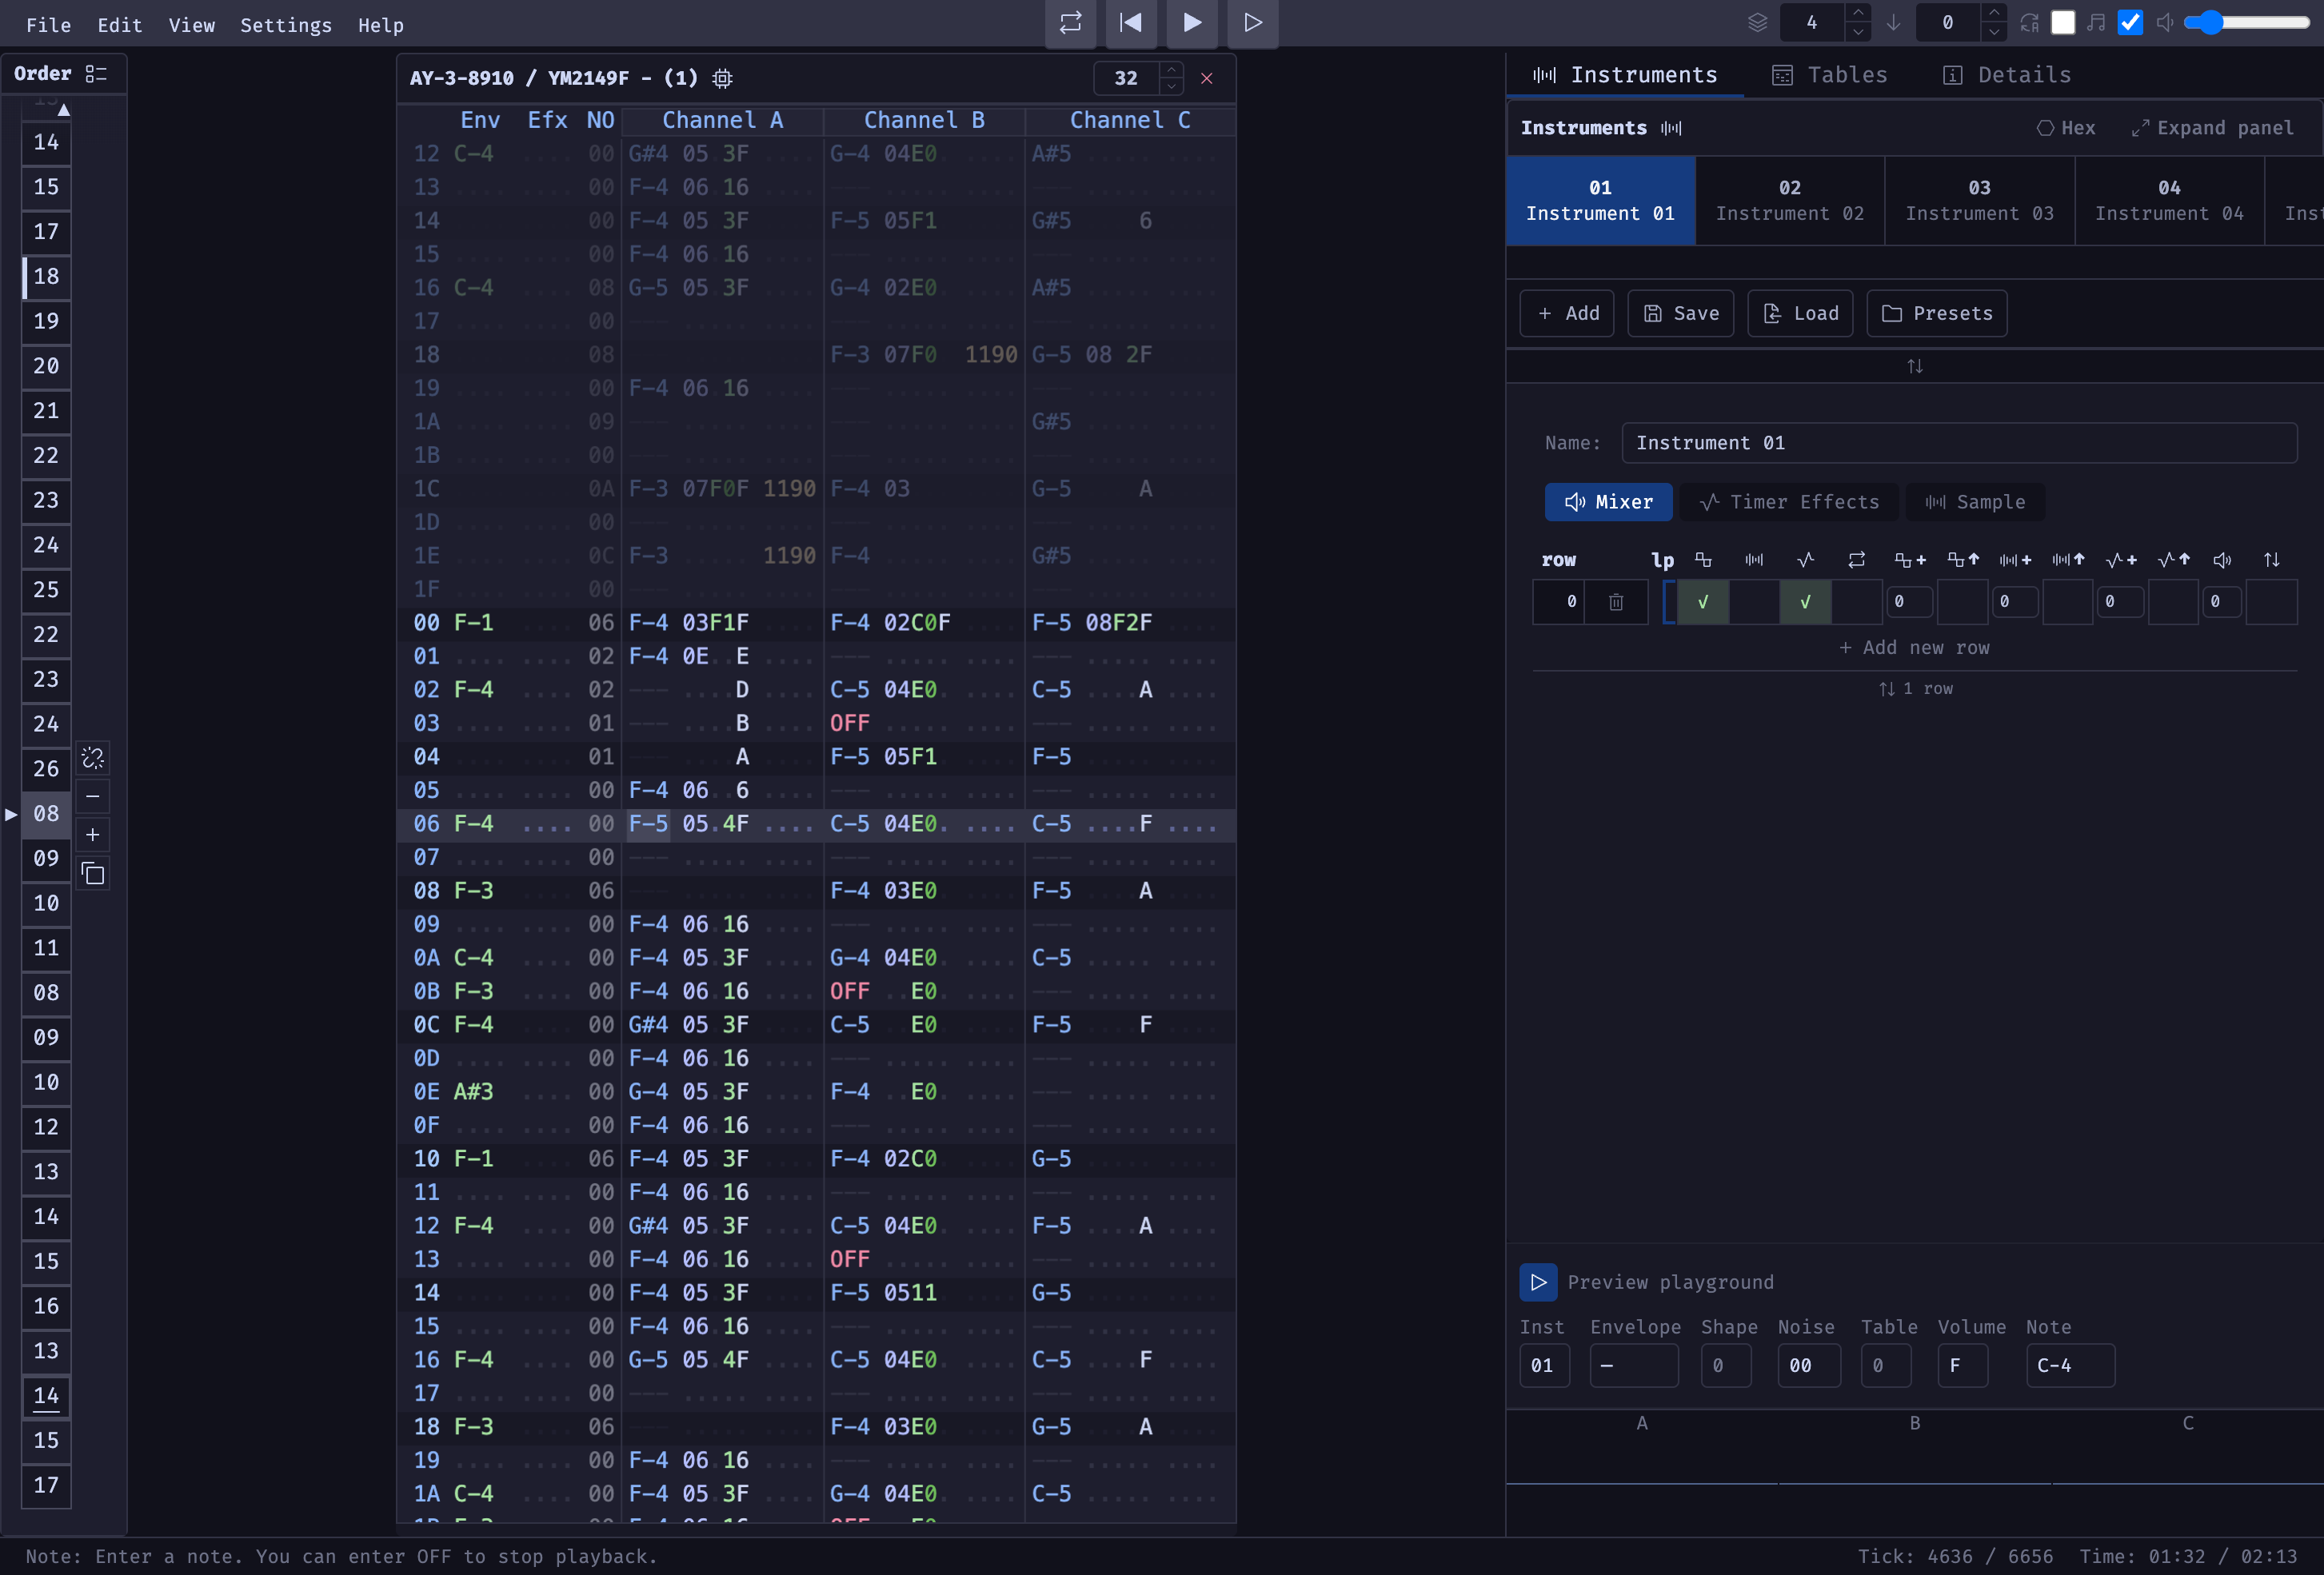
Layout
Every row starts with a row number, then optional global columns (shared by the whole row), then one block per channel.
AY-3-8910 / YM2149F
AY songs look close to Vortex Tracker / ProTracker 3: globals on the left, then channels A, B, and C.
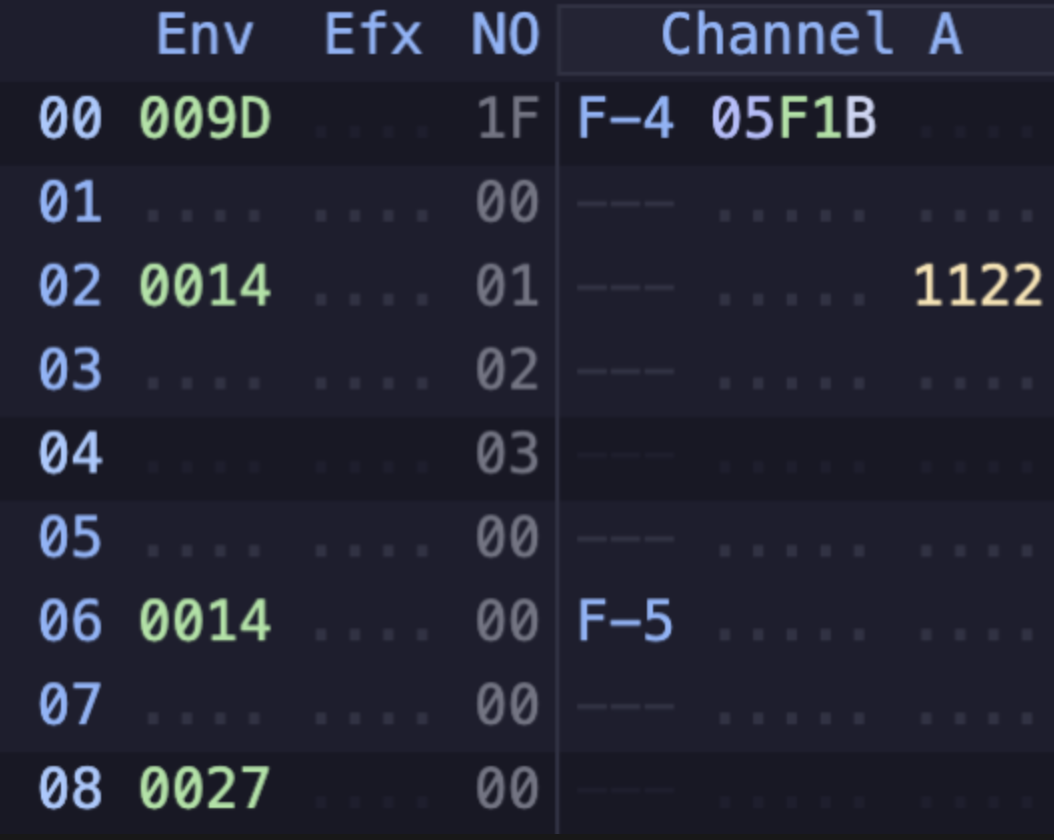
Global columns (one set for the whole row):
| Label | Field | What it is |
|---|---|---|
| Env | Envelope period | How fast the hardware envelope runs (0000-FFFF). Empty shows as .... |
| Efx | Envelope effect | Effects that target the envelope (same 4-character format as channel effects) |
| NO | Noise | Noise period (00-1F) - .. means "use value that was set previously" |
Per channel (A, B, C), fields are packed tightly:
note - instrument + envelope shape + table + volume - effect
| Field | Looks like | What it does |
|---|---|---|
| Note | C-4, C#4, ... or --- / OFF | Pitch to play. OFF stops the note |
| Instrument | 01-ZZ, or .. | Which instrument voice to use (base-36 id) |
| Envelope shape | 1-F, or . | Sets hardware envelope shape |
| Table | 0-9 / A-Z, or . | Ornament / arpeggio table (quick pitch patterns) |
| Volume | 0-F, or . | Channel volume. 0 = mute, . = keep previous |
| Effect | 4 chars, or .... | Pattern effect - see Effects |
Empty cells
Empty cells use dots (---, .., ., ....) instead of blank space. That makes it easy to see what is set and what is not.
NES (2A03 / 2A07)
NES support is still experimental. Channels are Pulse 1, Pulse 2, Triangle, Noise, and DPCM.
Each channel is:
note - instrument + table + volume - effect
Entering data
Put the cursor on a field, then type. The status bar at the bottom often hints what the current field expects.
- Notes - on a note field, play the computer keyboard like a piano (layout in Keyboard). Press
Afor OFF (note cut). Delete or Backspace clears back to---. - Octave - use the toolbar octave (1-8), or
*//while you work, so you are not stuck in one range. - Hex and symbols - type
0-9andA-Ffor hex fields, orA-Zfor instrument and table ids. Empty digits show as.. - Effects - Four characters. See Effects.
- Edit step - toolbar Step (
0-255). After you enter something, if step is greater than0, the cursor jumps down that many rows - handy for sparse rhythms. Set it to0to stay on the same row. - Auto-enter instrument - optional in settings. When on, placing a note can also write the instrument you currently have selected, so you type less.
Hold Mod and click an instrument or table field to jump to that instrument or table in the side panels - useful when you want to tweak the sound you just used.
Step values
Step 1 feels like a classic tracker. Higher steps (for example 2 or 4) are great for drums and off-beat stabs without filling every row by hand.
Navigation
| Action | Default |
|---|---|
| Move cursor | Arrow keys |
| Extend selection | Shift + arrows |
| Page up / down | PageUp / PageDown (16 rows) |
| First / last row | Home / End |
| First / last column | Mod+Home / Mod+End |
| Next channel | ` |
If you move past the top or bottom of the pattern, Bitphase will jump into the previous or next order entry when one exists - so you can keep editing through the song without hunting in the order list every time.
Faded ghost rows from neighboring patterns may appear at the edges. They are only for context; you edit the solid rows of the current pattern.
Selection and clipboard
Select a block of cells by dragging with the mouse, or hold Shift while you move with the keyboard. Most edits (copy, transpose, increment, clear) apply to the whole selection when you have one.
Select all (Mod+A) grows in stages while playback is stopped:
- The full column under the cursor
- The full channel (or all global fields if you are in Env / Efx / NO)
- The entire pattern
Press it again to widen - no need to drag a huge rectangle by hand.
| Action | Default | Behavior |
|---|---|---|
| Copy | Mod+C | Copy the selection, or the current cell if nothing is selected |
| Cut | Mod+X | Copy, then clear |
| Paste | Mod+V | Paste starting at the cursor |
| Magic paste | Mod+Shift+V | Paste, but empty clipboard cells (---, ., ...., ...) leave existing data alone |
| Clear | Delete / Backspace | Reset selected cells |
| Insert row | Mod+I | Insert an empty row at the cursor; rows below shift down (last row drops off) |
| Remove row | Mod+R | Delete the cursor row; rows below shift up (empty row padded at the end) |
Magic paste
Use magic paste when you want to layer data - for example paste some notes over other notes without wiping the data where the clipboard had empty cells.
In AY, paste can also convert between a note and the Env period when those fields are involved, using the song's tuning table. That pairs well with envelope-as-note mode (below).
Mute, solo, and virtual channels
- Click a channel header (A, B, C, ...) to mute or unmute that track.
F8solos the channel under the cursor. Press again (or use unmute all) when you want the full mix back.- Right-click a channel header for Play solo, Unmute all, and virtual-channel options.
Virtual channels let several editor tracks share one hardware voice - for example A1 and A2 both feed hardware channel A. That is useful for dense writing without inventing extra chip channels. Add or remove them from the channel header menu. The leftmost virtual channel takes priority over what's playing - if silent, it enables virtual channels on the right.
Editing tools
| Action | Default |
|---|---|
| Increment / decrement | = / - |
| Transpose octave up / down | Shift++ / Shift+- |
| Swap channel left / right | Mod+Alt+← / Mod+Alt+→ |
| Insert / remove pattern row | Mod+I / Mod+R |
| Apply script... | Mod+Shift+S |
| Undo / redo | Mod+Z / Mod+Y |
Increment / decrement is selection-aware: if any notes are selected, only notes move; otherwise numeric fields change. For effects, Bitphase adjusts the parameter (or the table id when the effect uses T), not the effect letter or delay.
Channel swap is a quick way to try a line on another voice or fix a mix-up without retyping.
AY helpers
Auto envelope (toolbar)
When an AY song is active, the toolbar Auto Env control (or Mod+E) can fill the Env period for you. Pick a ratio such as 1:1, 3:4, or 1:2, then enter a note and an envelope shape - Bitphase writes a matching Env value.
This works best with repeating shapes 8, A, C, and E.
Auto Env vs effect EA
Toolbar Auto Env is an editor helper while you write. Pattern effect EA in the Efx column is a runtime auto-envelope during playback. They solve related problems in different places - see Effects for EA.
Envelope as note
Mod+Shift+E shows Env as a note name instead of four hex digits. You can then “play” the envelope period with the same piano keys you use for channel notes. Increment and octave transpose treat it like pitch while this mode is on.
Pattern length
Patterns can be 1 to 256 rows long. New songs use the project's default length - change an individual pattern when a section needs more or less room.